Pani Puri (Golgappa) — Authentic Indian Street Food with Spiced Water
Authentic pani puri recipe — crispy hollow semolina shells filled with spiced potato and chickpea mixture, drowned in icy cold mint-tamarind water. The explosive one-bite Indian street food beloved across South Asia. Vegan, gluten-free-friendly, and 100% halal.
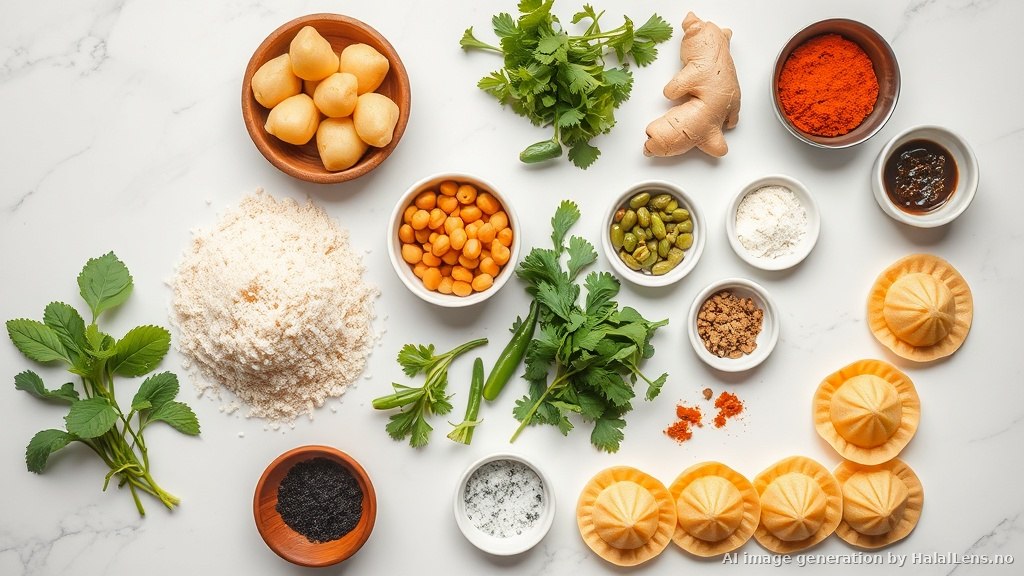
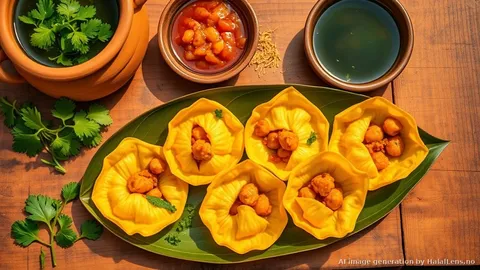
Pani puri — known as golgappa in Delhi and Punjab, gupchup in Odisha and Bihar, and puchka in Bengal — is arguably the most beloved street food in all of India. These small, hollow semolina or whole wheat shells are fried until perfectly crispy and puffed, then cracked open at the top, filled with a tangy mixture of spiced mashed potato and chickpeas, and drowned in cold, bracingly spiced tamarind-mint water before being popped whole into the mouth in a single, joyous, explosive bite. The experience of eating pani puri is unlike anything else in food — the crunch of the shell giving way to a flood of cold, intensely flavoured water, the starchiness of the potato filling grounding the whole thing, the heat of green chili and black pepper cutting through the sour tamarind. Pani puri is street food as theatre, as communion, as pure sensory delight. It is entirely plant-based, naturally halal, and deeply, irreversibly addictive.
The History and Culture of Pani Puri
Pani puri is ancient in spirit even if its precise origins are debated. Some food historians trace the puri shell to the deep-fried bread traditions of the Gangetic plains, where small, hollow rounds of unleavened dough have been fried since at least the medieval period. The combination of puffed fried dough with spiced water is believed to have originated in the Magadh region of present-day Bihar — an area with a rich culinary tradition that includes many sour, fermented, and water-based flavour profiles. By the 19th century, pani puri sellers (golgappewale) were a fixture of bazaars and market streets across northern India, their carts laden with huge clay pots of spiced water and trays of crisp puris.
The democratising genius of pani puri is that it transcended every social boundary. Unlike restaurant food, which in India has historically been stratified by caste and class, pani puri was always street food — consumed standing up, in equal measure by students, labourers, office workers, and film stars. The vendor (bhaiya) is a figure of near-mythological status in Indian urban culture: the man who knows exactly how much chili you can handle, who fills the puri with the speed and precision of a surgeon, who extends the plate (thali or leaf) for "one more" with a knowing smile.
Pani puri has also become a site of fierce regional pride. Every Indian state and city insists its version is the authentic one. In Kolkata, puchka uses a darker, crunchier shell made with atta (whole wheat flour) rather than semolina, and the filling includes tamarind pulp inside the puri as well as outside. In Mumbai, the shells are smaller and the water more heavily seasoned with black salt (kala namak). In Delhi, the golgappa water is often made more tart with raw mango powder (amchur). In Hyderabad, a sweeter tamarind chutney is added alongside the pani. The Gujarati version adds a sweet date chutney as a finishing element. Each variation is authentic to its place, and debates about which is "best" are both passionate and entirely pointless — the answer depends on where you grew up.
The beauty of pani puri lies not in the recipe but in the ritual: the vendor cracks the shell with a practiced thumb, fills it in one fluid motion, dunks it in the water, and presents it to you. You must eat it immediately. There is no delaying, no conversation — just the bite, the explosion, and then the hand reaching out for another.
Recipe Snapshot
| Servings | 4–6 (about 30–36 puris) |
| Prep time | 30 minutes |
| Rest time | 20 minutes (dough) |
| Cook time | 30 minutes |
| Total time | 80 minutes |
| Difficulty | Intermediate |
Ingredients: The Puri Shells
- 1 cup (160 g) fine semolina (sooji/rava) — the finer the grind, the crisper the shell
- 2 tablespoons all-purpose flour (maida), for binding
- ¼ teaspoon baking soda
- ¼ teaspoon salt
- 5–6 tablespoons water, at room temperature (just enough to bring the dough together)
- Vegetable oil, for deep frying
Ingredients: The Spiced Potato Filling (Masala)
- 3 medium potatoes (about 400 g), boiled and roughly mashed — not smooth
- ½ cup (90 g) cooked chickpeas (chana), drained and lightly crushed
- ½ teaspoon roasted cumin powder
- ½ teaspoon red chili powder
- ¼ teaspoon black salt (kala namak) — essential for authenticity
- 2 tablespoons fresh cilantro, finely chopped
- 1 tablespoon tamarind chutney (see below, or use store-bought)
- Salt to taste
Ingredients: The Pani (Spiced Water)
- 1 large bunch fresh mint leaves (about 60 g), washed
- 1 small bunch fresh cilantro (about 30 g), washed
- 2 green chilies (adjust to heat preference)
- 1-inch piece fresh ginger
- 3 tablespoons tamarind paste (from a block dissolved in water, seeds removed)
- 1 teaspoon black salt (kala namak) — the flavour that defines authentic pani puri water
- 1 teaspoon roasted cumin powder
- ½ teaspoon black pepper, freshly ground
- ¼ teaspoon regular salt (adjust to taste)
- 1 teaspoon sugar (balances the sour)
- 4 cups (1 litre) cold water
- Ice cubes, for serving
Ingredients: Sweet Tamarind Chutney (Meethi Chutney)
- 3 tablespoons tamarind paste
- 2 tablespoons jaggery or dark brown sugar
- ½ teaspoon roasted cumin powder
- ¼ teaspoon black salt
- Pinch of red chili powder
- 4–6 tablespoons water
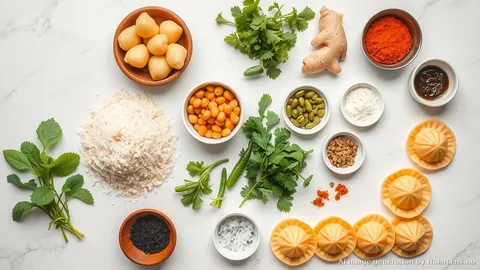
Method
Part 1 — Make the Puri Shells
Step 1 — Mix and Rest the Dough
Combine the semolina, all-purpose flour, baking soda, and salt in a mixing bowl. Add water tablespoon by tablespoon, mixing with your fingers between additions, until the dough just comes together — it should be stiff, not soft or sticky. Knead for 3–4 minutes until smooth. Cover tightly with a damp cloth and rest for 20 minutes. This resting period is essential: the semolina absorbs the water and the gluten in the flour relaxes, making the dough easier to roll and ensuring the puris puff properly when fried.
Step 2 — Roll the Puris
Divide the rested dough into 2–3 portions. Working with one portion at a time (keep others covered), roll on a clean, un-floured surface to a thickness of approximately 2 mm — about the thickness of a coin. Do not flour the surface; a slightly tacky surface helps you roll thin. Using a small round cutter or the rim of a glass (about 4 cm / 1.5 inches in diameter), cut out circles. Re-roll the scraps immediately. You should get about 30–36 puris from this quantity. Keep the cut puris covered with a dry cloth to prevent them from drying out before frying.
Step 3 — Fry the Puris
Heat vegetable oil in a deep kadai or heavy-bottomed pot to 175–180°C (350°F). Test the oil by dropping in a tiny piece of dough — it should rise to the surface within 2–3 seconds and sizzle actively. If it sinks and rises slowly, the oil is too cool; if it browns within seconds, it is too hot. Add 4–5 puris at a time — do not overcrowd, as this drops the temperature and prevents proper puffing. As soon as a puri hits the oil, use the back of a slotted spoon to gently press down on it for 2–3 seconds. This encourages the trapped air to expand and push the puri into its characteristic hollow, puffed shape. The puri should puff fully within 15–20 seconds. Flip and fry for another 20–30 seconds until golden and crispy on both sides. Remove with a slotted spoon and drain on a paper towel. Allow to cool completely before filling — puris that have not cooled will become soggy quickly.
Part 2 — Make the Pani
Step 4 — Blend the Green Base
Combine the mint leaves, cilantro, green chilies, and ginger in a blender. Add just enough water (2–3 tablespoons) to allow blending. Process to a fine, smooth green paste. The vibrant green colour of this paste is what gives authentic pani puri water its characteristic appearance. If your blender struggles with the quantity, add the herbs in batches.
Step 5 — Build the Pani
Transfer the green paste to a large jug. Add the tamarind paste, black salt, roasted cumin powder, black pepper, regular salt, and sugar. Add the cold water and stir thoroughly to combine. Taste and adjust: the pani should be a balance of sour (tamarind), fresh-herbal (mint and cilantro), spicy (green chili, black pepper), and saline (kala namak). The black salt provides a distinctive sulphurous, mineral note that is absolutely essential to authentic pani puri water — there is no substitute. Strain the pani through a fine mesh strainer for a smooth texture, or leave it unstrained for a more rustic, herb-flecked appearance. Chill for at least 1 hour before serving — ice-cold pani is not optional; it is fundamental to the experience. Add ice cubes when serving.
Part 3 — Make the Filling and Chutney
Step 6 — Prepare the Potato Masala
Combine the roughly mashed potatoes with the crushed chickpeas, roasted cumin powder, red chili powder, black salt, chopped cilantro, and a spoonful of the tamarind chutney. Mix together without overworking — you want a textured mixture with some visible chunks of potato and chickpea, not a smooth purée. Taste and adjust the salt. The filling should be well-seasoned, slightly tangy, and lightly spiced. Set aside at room temperature until ready to serve.
Step 7 — Make the Tamarind Chutney
Combine the tamarind paste, jaggery or sugar, cumin powder, black salt, and red chili powder in a small saucepan. Add water and bring to a gentle simmer over medium heat, stirring until the jaggery dissolves. Simmer for 3–4 minutes until the chutney coats the back of a spoon. Remove from heat and allow to cool. The chutney should be thick enough to drizzle but not so thick that it clumps. This sweet, sour, and subtly spicy chutney is used both inside the filling and as a finishing drizzle.
Part 4 — Assemble and Serve
Step 8 — Assemble and Eat Immediately
Set up a pani puri station: puris in a bowl or covered basket, filling in a separate bowl, pani in a jug set over ice, and chutney in a small bowl. To assemble each puri: use your thumb or a teaspoon to make a small hole in the thinner top of the puri — just large enough to admit a teaspoon of filling. Add a heaped teaspoon of the potato-chickpea masala. Add a small drizzle of tamarind chutney if desired. Hold the filled puri over the pani jug and pour or dunk it until the puri is completely filled with the cold, spiced water. Eat immediately — in one bite if possible. The moment between filling with water and eating is measured in seconds; delay means the puri softens and the experience is lost. This is both the challenge and the joy of pani puri.
Regional Variations
Puchka (Kolkata Style)
Kolkata's puchka is arguably the most intense version. The puri shell is made entirely from whole wheat flour (atta), making it darker, crunchier, and more robust than semolina puris — it can hold more water without immediately softening. The filling typically includes mashed potato mixed with a tangy tamarind water (aamlodi pani), creating a double-tamarind effect when the water is added. The pani is made with aamloki (a small sour fruit also known as amla or Indian gooseberry) instead of tamarind, giving it a uniquely sharp, fruity, intensely sour quality. Many Mumbaikars concede that the puchka is the superior form.
Golgappa (Delhi / North India)
The classic semolina-based version described in this recipe is broadly the Delhi/North Indian style. The puri tends to be slightly larger than the Mumbai version, and the pani is often made more tart with amchur (raw mango powder) in addition to tamarind. The filling often includes sprouted moong beans (moong sprouts) alongside the potato and chickpea.
Mumbai Pani Puri
Mumbai puris are small — barely larger than a 50 paise coin — with a thin, exceptionally crispy shell. The pani is particularly well-seasoned with black salt and the mint is blended fine for a very smooth, vibrant green water. A distinguishing feature of the Mumbai style is the addition of a small amount of lemon juice to the pani just before serving, which brightens all the flavours. The filling is simpler than other versions — mainly just mashed potato with cumin and black salt.
Dahi Puri (Yogurt Version)
Dahi puri replaces the spiced water with thick yogurt (dahi). The assembled puri is topped with yogurt, tamarind chutney, green chutney, sev (crispy chickpea noodles), and a dusting of chaat masala. The result is a completely different flavour profile — cooling, creamy, and sweet-sour rather than bracing and cold. Dahi puri is perfect for those who cannot handle very spicy food.
Tips for Perfectly Puffed Puris
- Fine semolina is non-negotiable: Coarse semolina will not roll thin enough and the puris will have a gritty texture. Buy the finest grade of semolina (sooji no. 1) or pass regular semolina through a fine sieve before using.
- A stiff dough makes crispy puris: The dough should be noticeably stiffer than roti or bread dough. If the dough is too soft, the puris will absorb oil and turn greasy rather than puffing crisply.
- Rolling thickness is critical: Aim for 2 mm. Thicker puris will not puff fully; thinner ones may burst during frying and will be fragile when filled. If in doubt, err towards the thinner side.
- The press technique: Immediately pressing each puri under the oil with a slotted spoon is the secret to consistent puffing. This forces the steam inside to expand rapidly, inflating the puri before the crust sets. Without this step, many puris will fry flat.
- Oil temperature matters: Too cool and the puris absorb oil and become greasy; too hot and they brown before puffing. 175–180°C is the sweet spot. A thermometer is highly recommended. If you do not have one, test with a small piece of dough.
- Cool completely before storing: Fried puris should be completely cool before being stored in an airtight container. Any residual warmth trapped inside will create steam that softens the shells. Properly stored puris stay crispy for 2–3 days.
- Black salt is not optional: The sulphurous, mineral character of black salt (kala namak) is what makes pani puri taste like pani puri. Table salt is simply not a substitute. Black salt is available at any South Asian grocery store and most health food stores.
Pani Puri During Ramadan
Pani puri occupies a special place in the Ramadan culinary calendar of South Asian Muslim families. As a light, refreshing, and entirely plant-based street food, it provides a perfect palate-cleanser between the heavy meat dishes that typically anchor iftar and sehri spreads. The cold, minty pani is especially welcome in the warm months of fasting, providing immediate hydration and a burst of flavour after a long day without food or water. The tamarind in the pani provides a natural source of potassium and helps restore electrolytes.
Pani puri is also popular as an iftar street food across India, Pakistan, and Bangladesh, where vendors set up stalls outside mosques in the hour before sunset prayers. Families break their fast with dates and water per the Sunnah, then head out for pani puri before returning for the full iftar meal. The social dimension of eating standing up with strangers at a street stall has particular resonance during Ramadan — a time of community, generosity, and shared experience.
For home Ramadan preparation, the puri shells can be made ahead and stored for up to 3 days in an airtight container, and the pani can be prepared the night before and chilled overnight (it actually improves in flavour after 24 hours). The potato filling is best made fresh but can also be prepared a few hours ahead. This makes pani puri practical for the busy evenings of Ramadan, when cooking time between iftar and tarawih prayers is limited.
Serving Suggestions and Accompaniments
- Chaat platter: Pani puri is at its best as part of a chaat platter alongside bhel puri (puffed rice salad), sev puri (crispy crackers with chutneys), and papdi chaat (yogurt and chickpea topping on crispy wafers).
- Two pani options: Offer both a spicy, tart green pani and a slightly sweeter, more tamarind-forward version. Guests can alternate between the two for contrasting experiences.
- Sev topping: A pinch of crispy sev (fine chickpea flour noodles, available at South Asian stores) added to the filling before dunking in water adds a contrasting texture that many prefer.
- Sweet finish: After the pani puri, serve a few dahi puris (yogurt-filled shells with sweet chutney) as a cooling, palate-cleansing conclusion to the meal.
Halal Considerations
Pani puri is one of the most straightforwardly halal dishes in South Asian street food cuisine — it is entirely plant-based, contains no meat, no alcohol, and no ambiguous processing agents. All the core ingredients — semolina, whole wheat, potatoes, chickpeas, mint, cilantro, green chilies, ginger, tamarind, and spices — are naturally and unambiguously halal. A few things to check when using packaged or processed versions of ingredients:
- Tamarind paste: Pure tamarind paste is halal. Some commercial tamarind concentrates contain additives or preservatives — check the ingredients list for anything unusual. The safest option is to dissolve a block of raw tamarind in water and strain out the seeds and fibres yourself.
- Pre-made puri shells: Ready-made pani puri shells are available at most South Asian grocery stores and are generally halal. Check the packaging for halal certification, particularly if purchasing from brands that also manufacture biscuits or snacks with non-halal ingredients on shared equipment.
- Chickpeas: Canned chickpeas are halal. Check that the can contains only chickpeas, water, and salt — some flavoured or seasoned varieties may contain non-halal additives.
- Chaat masala: Pre-mixed chaat masala is generally halal but may contain asafoetida (hing), which in some forms is processed with wheat flour. This is relevant for those with celiac disease or severe gluten sensitivity, but not a halal concern per se.
Use HalalLens to scan the ingredient labels of any packaged spice blends, tamarind products, or pre-made puri shells to verify halal compliance quickly and accurately.
AI disclosure: This recipe article was written with AI assistance and reviewed for accuracy. Ingredient halal statuses are verified through the HalalLens database. Always check product labels for certification.